Month: May 2025
Common Mistakes to Avoid
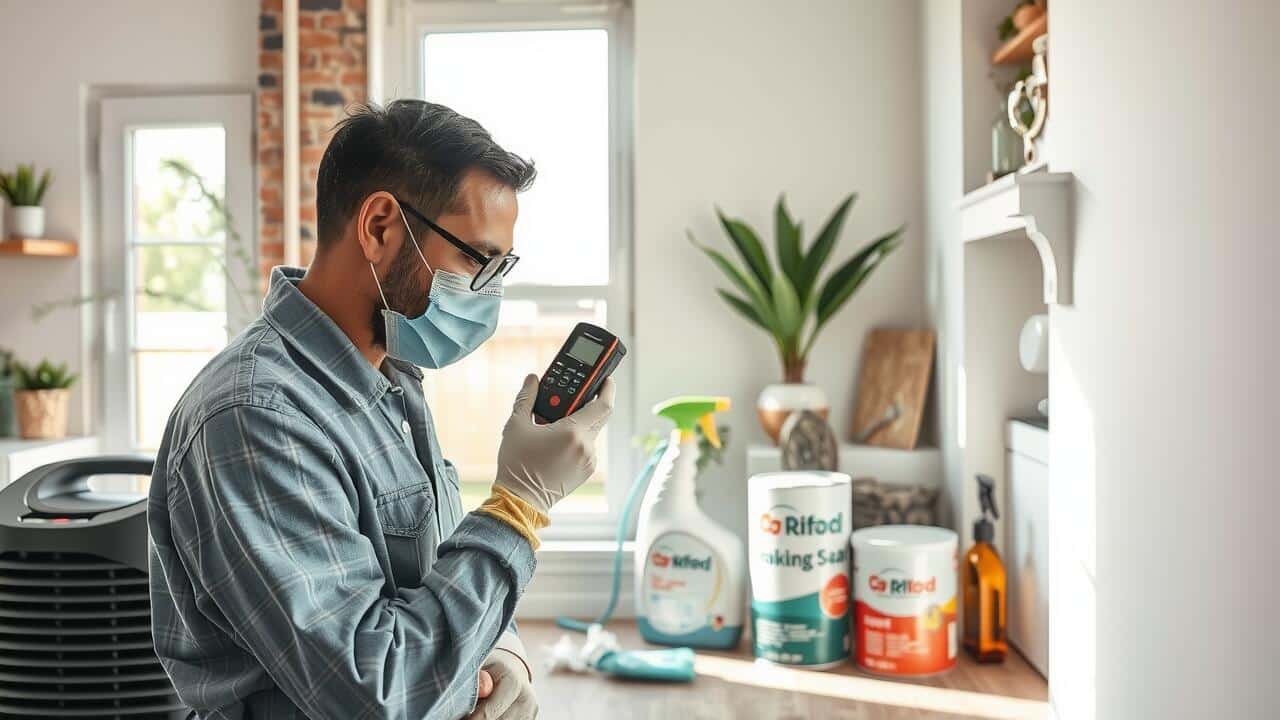
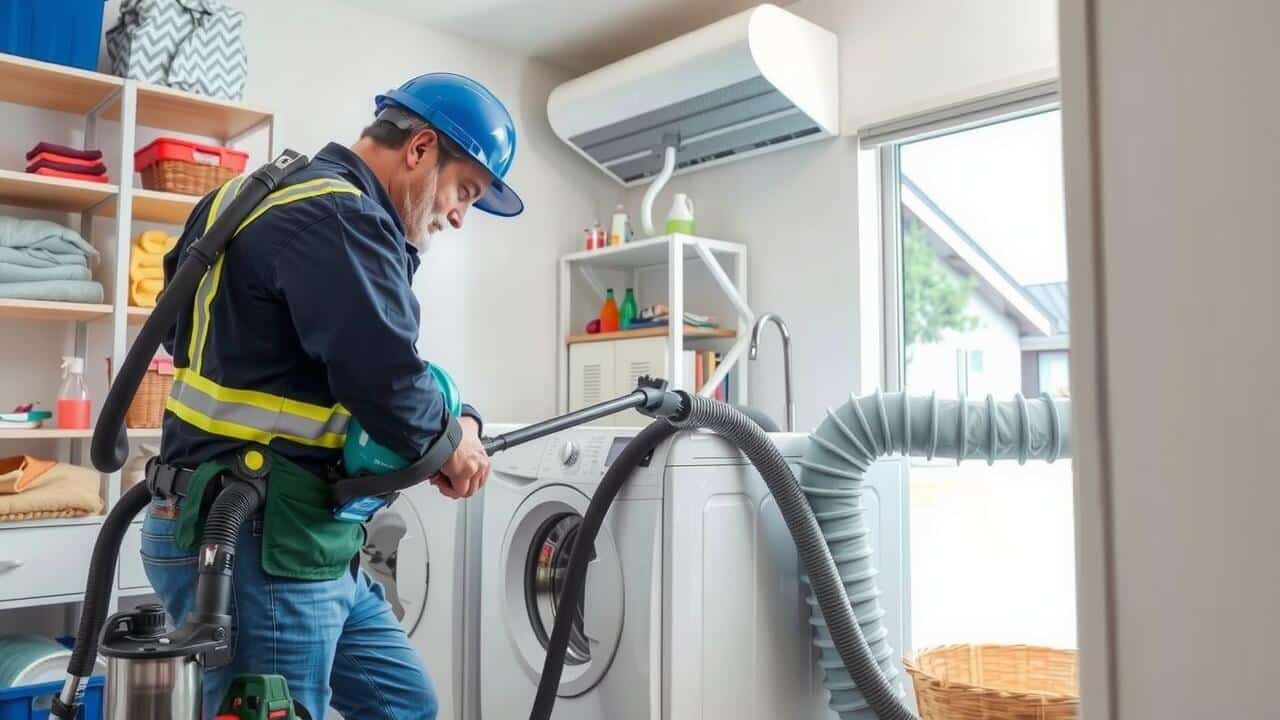
One common mistake during dryer vent cleaning is neglecting to unplug the dryer before starting the process. This oversight can lead to accidents or injuries if the machine is inadvertently turned on while being serviced. Additionally, many individuals forget to check the vent system for different materials that may obstruct airflow, such as lint buildup or even animal nests. A thorough inspection is essential for effective cleaning and prevention of future issues.
Another mistake is using inappropriate tools or methods that can damage the venting system. For example, using a vacuum cleaner without proper attachments can push lint further into the system instead of removing it. Relying solely on store-bought products that promise to clean the vent without actual manual effort can also be ineffective. Incorporating the right tools and techniques is crucial for successful dryer vent cleaning.
Pitfalls During Dryer Vent Maintenance
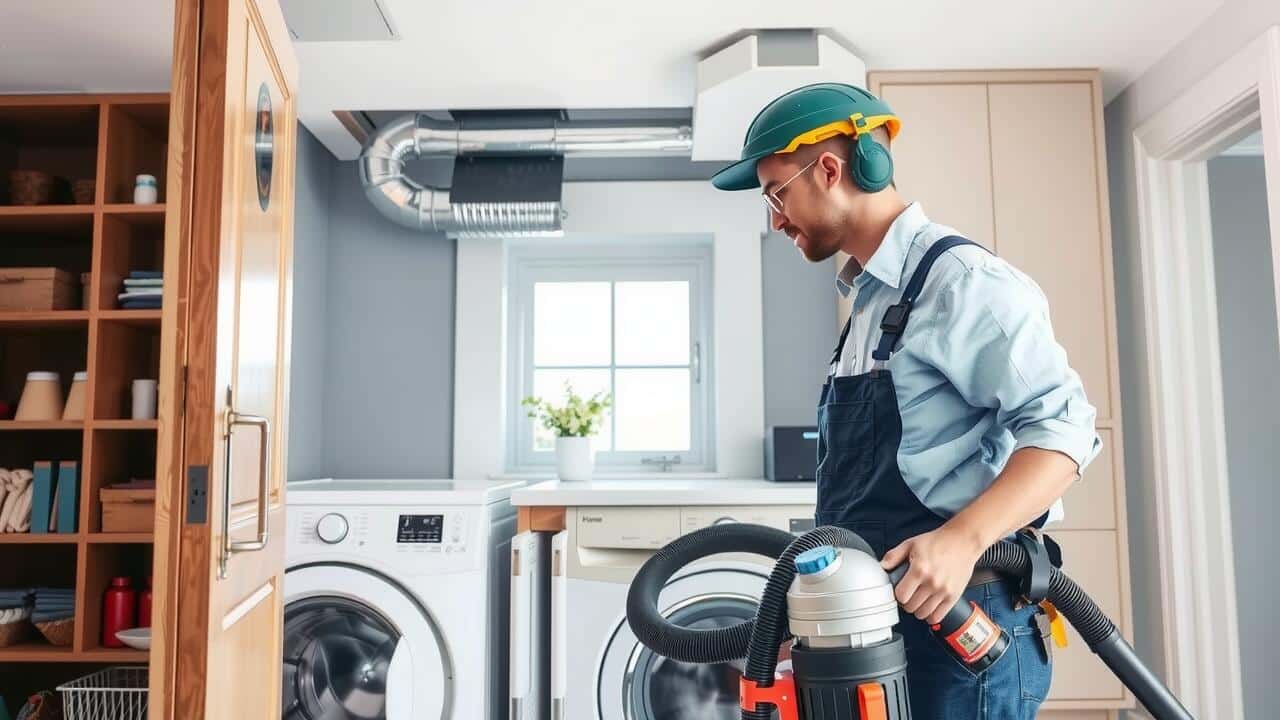
During dryer vent cleaning, one common pitfall is not addressing the venting materials outside the home. Failure to inspect areas like the vent hood can lead to blockages caused by lint buildup or animal nests. These hidden obstructions can significantly reduce airflow, ultimately compromising the efficiency of the dryer and increasing the risk of fire hazards. Ensuring all components of the ventilation system are clear is crucial for safe operation.
Another mistake often made during dryer vent maintenance is neglecting to follow manufacturer recommendations for cleaning frequency. Some homeowners may assume that an annual cleaning is adequate when, in fact, factors such as dryer usage and type of venting system can affect this timeline. Regularly assessing the performance of the dryer can help determine if more frequent dryer vent cleaning is necessary. Ignoring these guidelines can result in decreased appliance efficiency and increased energy bills.
How Often Should You Clean Your Dryer Vent?
Regular maintenance of your dryer vent is essential for safety and efficiency. Homeowners should aim to clean their dryer vents at least once a year. This frequency helps prevent the buildup of lint and other debris that can pose a fire risk. In households that frequently use the dryer or have pets, more frequent cleaning may be necessary. Observing your dryer’s performance can help determine if cleaning is needed sooner; signs such as longer drying times or hot exterior surfaces indicate potential blockages.
Monitoring airflow can also serve as a guideline for upkeep. If you notice a reduction in airflow or if clothes come out hotter than usual, your dryer vent likely requires immediate attention. Regular inspections can help identify problems before they escalate. Additionally, scheduling professional Dryer Vent Cleaning every few years can provide a thorough assessment and ensure that the vent system operates efficiently.
Recommended Cleaning Frequency
To maintain optimal performance and safety, regular dryer vent cleaning is essential. It is generally recommended to clean your dryer vent at least once a year. However, households that frequently use their dryer or have larger families may need to increase that frequency. Signs such as longer drying times or a burning smell can indicate that the vent is clogged and requires immediate attention.
In addition to annual cleanings, homeowners should inspect their dryer vents periodically for lint buildup. This proactive approach helps prevent potential hazards like fire risks and improves efficiency. Maintaining a clean dryer vent not only extends the life of your appliance but also conserves energy, leading to lower utility bills. Regular Dryer Vent Cleaning is an investment in both safety and functionality.
Alternative Methods for Dryer Vent Cleaning
For those who prefer not to tackle the task themselves, professional Dryer Vent Cleaning services are available. These experts have the tools and experience to ensure a thorough job. They can handle complex vent systems that might be challenging for a homeowner to clean effectively. The investment in professional cleaning can enhance the efficiency of your dryer and prolong its lifespan.
If you opt for a DIY approach, several tools can assist in the process. Dryer vent cleaning brushes and flexible rods allow for effective reach inside the vent system. Vacuum attachments specifically designed for dryer vents can also be useful in removing lint buildup. Remember, ensuring that your dryer vent is clean is crucial for safety and efficiency, regardless of the method you choose.
Professional vs. DIY Solutions
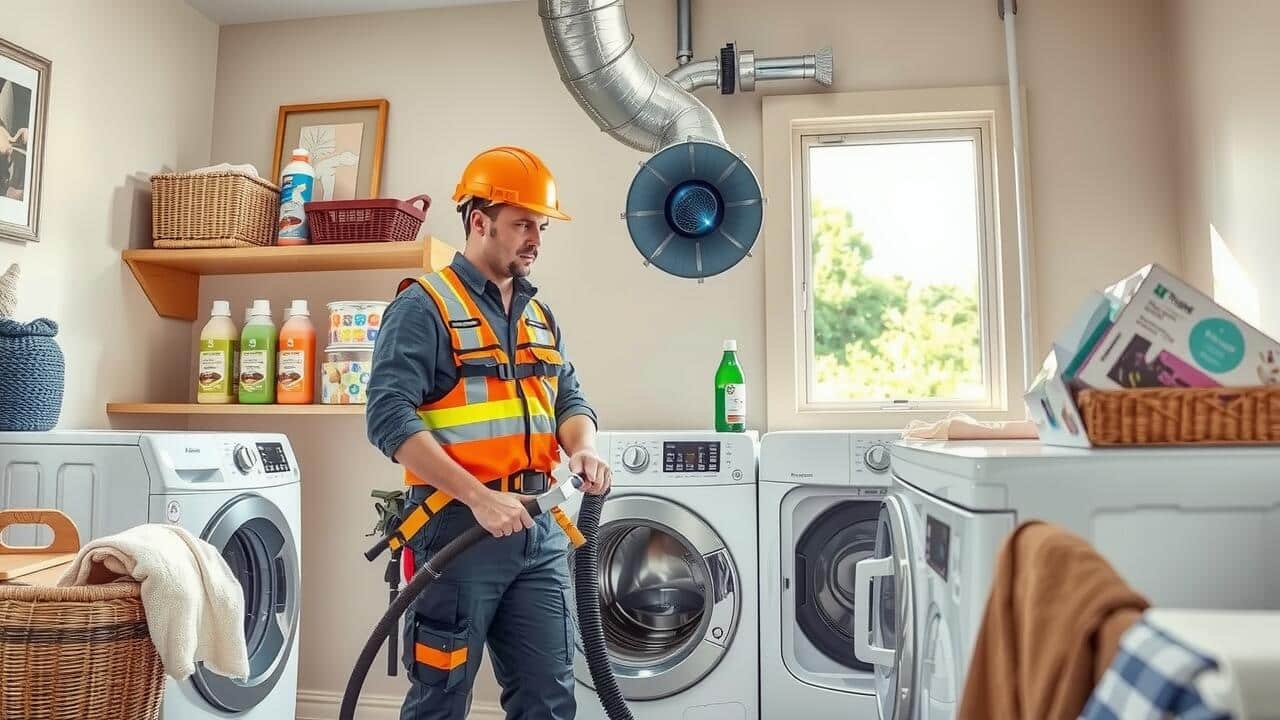
For many homeowners, the decision to tackle dryer vent cleaning may seem straightforward. DIY solutions often involve purchasing a lint brush or vacuum attachment designed for this specific task. These tools can help remove some of the accumulated lint and debris. However, without the right technique, it’s easy to miss vital areas that could lead to clogs or safety hazards.
Professional dryer vent cleaning services offer a thorough approach, using specialized equipment to access deep within the vent system. Experts can identify potential issues that an untrained eye might overlook, such as structural problems or harmful obstructions. Although hiring a professional may involve a higher upfront cost, the peace of mind provided by a comprehensive cleaning can outweigh the expense, especially considering the fire risks associated with inadequate maintenance.
FAQS
Can I clean my dryer vent myself?
Yes, you can clean your dryer vent yourself if you have the right tools and follow proper safety procedures. However, if you’re unsure or uncomfortable with the process, it’s best to hire a professional.
What are the common mistakes to avoid when cleaning my dryer vent?
Common mistakes include not disconnecting the dryer from the power source, using inadequate tools, and neglecting to clean the entire vent line, including bends and turns.
How often should I clean my dryer vent?
It’s recommended to clean your dryer vent at least once a year, but this frequency may increase depending on usage. If you notice longer drying times or lint accumulation, consider cleaning it more often.
What are the alternative methods for cleaning a dryer vent?
Alternative methods include using a vacuum with a long hose attachment, dryer vent cleaning kits, and brushes specifically designed for vent cleaning. Professional services are also an option for thorough cleaning.
How do I know if my dryer vent needs cleaning?
Signs that your dryer vent needs cleaning include longer drying times, excessive lint buildup around the lint trap, a burning smell while the dryer is running, or the dryer becoming unusually hot during operation.
Related Links
Seasonal Considerations for Vent Cleaning
Seasonal changes can directly impact the effectiveness of your dryer vent. In the fall and winter months, debris such as leaves, lint, and even snow can accumulate in and around the vent. This buildup may lead to restricted airflow, raising the risk of fire hazards and inefficiencies in dryer performance. Regular cleaning during these seasons helps maintain optimal ventilation, ensuring your dryer operates safely and effectively.
Spring and summer also require attention when it comes to dryer vent cleaning. Increased humidity levels in these seasons can cause lint to clump together, creating further blockages. Scheduling a professional cleaning during the early spring can prevent potential issues before the peak of the drying season arrives. It is crucial to monitor performance throughout the year, as staying proactive can save money on energy bills and prolong the lifespan of your appliances.
Best Times to Schedule a Service
Timing plays a significant role in maintaining the efficiency of your dryer. Scheduling Dryer Vent Cleaning at least once a year is often recommended, particularly if you use your dryer multiple times weekly. Many homeowners find spring or fall to be ideal, as these seasons tend to be less busy. Cleaning during these times ensures that your dryer runs efficiently before heavy usage during colder or stormy months.
Another ideal time for Dryer Vent Cleaning is just before the holiday season. Many families increase laundry loads during this period due to hosting gatherings and events. Ensuring your dryer is clean and functioning optimally can save time and prevent potential hazards. Regular checks and cleanings can significantly decrease the risk of fire and increase the lifespan of your appliance.
Choosing a Reliable Service Provider
Finding a reliable service provider for dryer vent cleaning can greatly impact the effectiveness of the cleaning and the safety of your home. Start by researching local companies with positive customer reviews and ratings. Word-of-mouth recommendations can also prove invaluable. Ensure that the providers you consider are insured and offer written estimates. This helps establish trust and transparency regarding their services.
When evaluating potential providers, inquire about their experience and the techniques they use for dryer vent cleaning. A professional should have the necessary certification and training in this specialized field. Additionally, ask about the equipment they utilize, as modern tools often result in a more thorough job. Establishing communication and clear expectations can lead to a more satisfactory experience.
What to Look For
When selecting a service provider for dryer vent cleaning, look for companies that have relevant experience and positive customer reviews. Established providers often showcase their expertise through testimonials and case studies. It is essential to verify their credentials, such as licensing and insurance, to ensure that they adhere to industry standards and regulations.
Another important factor is the equipment used in the cleaning process. A reliable service should employ advanced tools and techniques to thoroughly clean vents. Inquire about their cleaning methods and whether they offer a satisfaction guarantee. This not only demonstrates professionalism but also reflects their commitment to providing quality service for dryer vent cleaning.
The Cleaning Process Explained
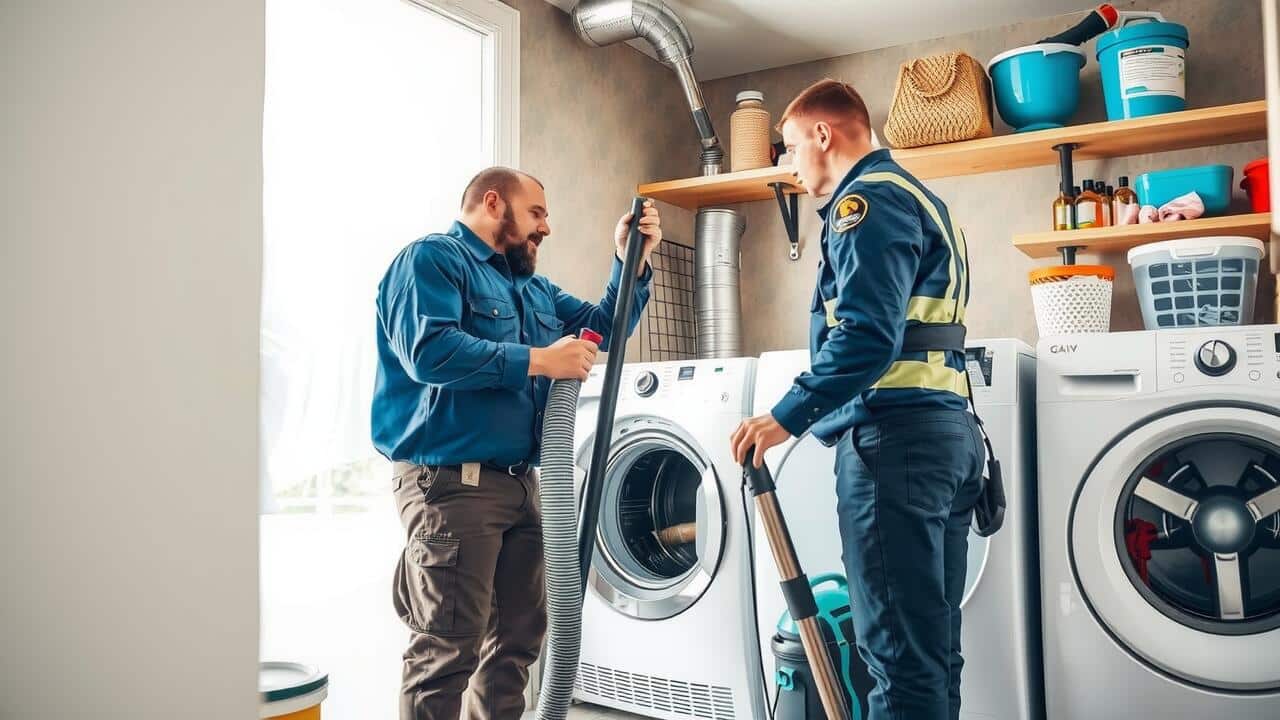
Dryer vent cleaning involves a series of steps designed to remove accumulated lint and debris from the duct system. Initially, a professional technician inspects the venting system to identify any obstructions or damage that could hinder airflow. The technician then disconnects the dryer from the vent and uses specialized equipment, such as rotary brushes and high-powered vacuums, to clear out the ductwork thoroughly. This thorough cleaning process ensures that the dryer operates efficiently and reduces the risk of fires.
Once the cleaning is complete, the technician performs a final inspection to ensure that all debris has been removed. They may also check the connections for any issues that need addressing. After the inspection, the dryer is reconnected, and the technician may run a test cycle to confirm proper operation. This comprehensive approach not only improves the efficiency of the appliance but also prolongs its lifespan. Regular dryer vent cleaning is essential for maintaining a safe and effective laundry environment.
Steps Involved in Professional Cleaning
The professional cleaning process for dryer vents typically begins with an initial inspection. Technicians visit the site to assess the venting system’s condition, checking for blockages, damage, or improper installations. They may use specialized tools like cameras to visually inspect the ductwork, allowing them to determine the best approach for the cleaning procedure. This assessment is crucial in identifying any underlying issues that could affect the efficiency of the dryer vent.
Once the inspection is complete, the cleaning process can proceed. The technician will use powerful vacuums and rotating brushes to dislodge and remove lint, debris, and other obstructions from the vents. Attention is paid not only to the accessible areas but also to the ducts that may be hidden behind walls or ceilings. Proper cleaning ensures that the dryer operates efficiently and reduces the risk of fire hazards associated with clogged vents. After the job is done, the technician may offer recommendations for maintaining cleanliness and efficiency between professional dryer vent cleaning sessions.
FAQS
What is the average cost to clean out a dryer vent?
The average cost to clean out a dryer vent typically ranges from $100 to $250, depending on factors such as the length of the vent and the level of cleaning required.
Are there any seasonal considerations for dryer vent cleaning?
Yes, it is recommended to clean your dryer vent at least once a year, ideally in the spring or fall, as these seasons often coincide with increased dryer use and can help prevent lint buildup.
How do I know if my dryer vent needs cleaning?
Signs that your dryer vent needs cleaning include longer drying times, a burning smell, lint buildup around the dryer, and the dryer feeling hot to the touch during operation.
What should I look for in a reliable service provider for dryer vent cleaning?
When choosing a service provider, look for certifications, positive customer reviews, experience in the industry, and appropriate insurance coverage to ensure you are hiring a trustworthy professional.
What does the professional dryer vent cleaning process involve?
The professional cleaning process typically includes inspecting the vent system, using specialized tools to remove lint and debris, and ensuring the vent is properly reassembled and functioning optimally.
Related Links
DIY vs. Professional Cleaning
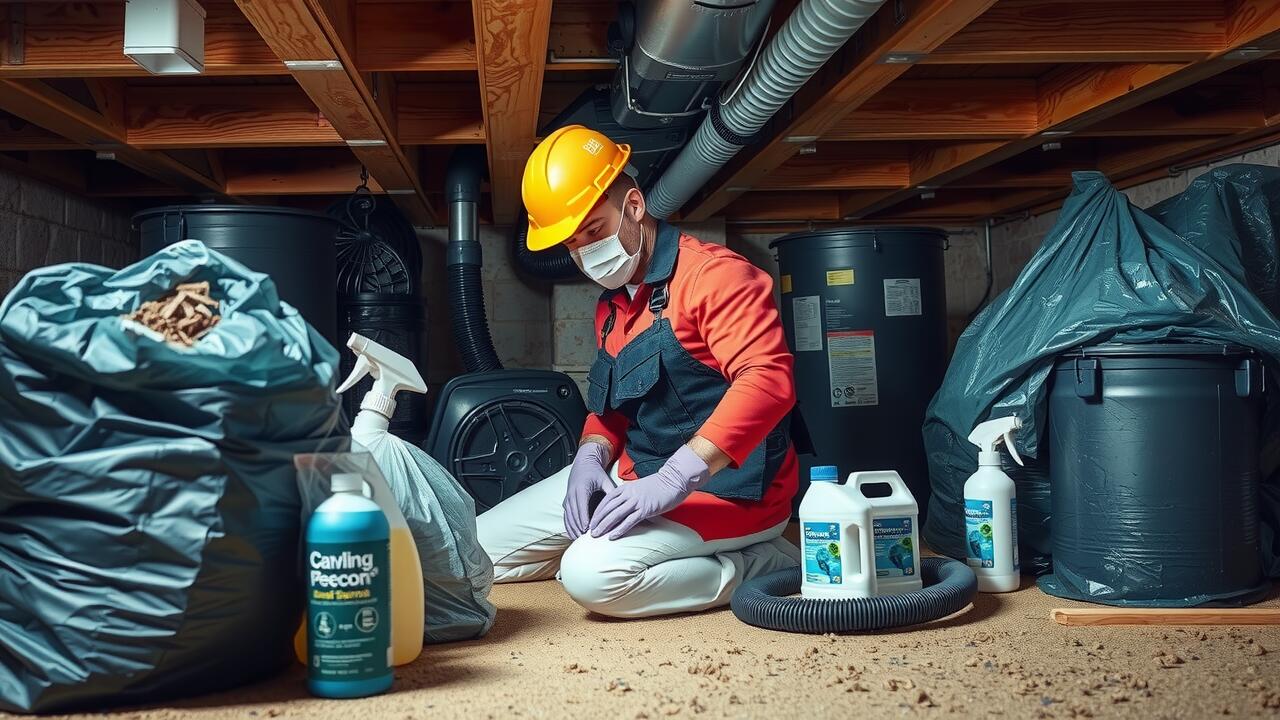
Many homeowners consider tackling crawlspace cleanup as a DIY project. This approach often saves money and allows individuals to take control of the cleaning process. Essential tools such as gloves, masks, and vacuums can make the task manageable. Homeowners may also find satisfaction in completing the work themselves, gaining insights into their property and potential issues like mold or pest infestations.
On the other hand, hiring professionals for crawlspace cleanup can provide peace of mind. Experts bring specialized equipment and experience that can ensure a thorough job. They are trained to handle hazardous materials safely and can identify underlying problems that may not be visible to the untrained eye. While the cost may be higher, the knowledge and expertise of professionals can ultimately lead to a healthier home environment.
Pros and Cons of Each Approach
When considering whether to undertake crawlspace cleanup yourself or hire a professional, each approach offers distinct advantages and disadvantages. DIY cleaning allows homeowners to save money and tailor the process to their specific needs. Flexibility in scheduling is another benefit, as it enables individuals to work at their own pace. However, the lack of expertise can lead to oversights, and without the right equipment, the job may take longer than expected.
On the other hand, hiring a professional for crawlspace cleanup can ensure a thorough job, as experts often have specialized knowledge and equipment. They can identify potential issues that an untrained eye might miss, such as mold or structural damage. Nevertheless, this approach comes at a cost. Homeowners must weigh the financial investment against the peace of mind that comes from knowing the job is done correctly.
Tools and Materials Required
When preparing for a crawlspace cleanup, having the right tools and materials is essential. Basic safety equipment should be prioritized, including gloves, masks, and goggles. These items protect against dust and potential allergens commonly found in crawl spaces. A good-quality flashlight will help illuminate dark corners, allowing for better visibility while assessing the area. A shovel or scoop is also useful for removing debris, while a wet/dry vacuum is effective for extracting moisture and dirt.
In addition to safety gear and cleaning tools, consider using specific materials tailored for maintenance. A moisture barrier, such as heavy-duty plastic sheeting, can help prevent water accumulation and inhibit mold growth. If pests are a concern, think about incorporating traps or repellents to deter unwanted visitors. For long-term protection, a dehumidifier may be beneficial to maintain optimal humidity levels within the crawl space. Proper preparation sets the foundation for a successful crawlspace cleanup.
Essential Equipment for a Clean Crawl Space
To effectively conduct a Crawlspace Cleanup, having the right equipment is crucial. A sturdy pair of gloves is essential to protect your hands from sharp objects or contaminants. A mask can help filter out dust and other particulates that may be present in the air. For safety, ensure you have a reliable flashlight to illuminate dark areas, as visibility is often limited in crawl spaces. A sturdy kneepad will make the process more comfortable, especially if you’ll be spending a lot of time on your knees.
In addition to personal protective gear, some tools are indispensable for the cleanup process. A shop vacuum with a wide hose is useful for removing debris and dust efficiently. A broom and dustpan will help tidy up any loose dirt or small particles. For larger items or trash, contractor bags are essential for collecting waste. A long-handled brush can assist in scrubbing surfaces that require deep cleaning. Using these tools will streamline the Crawlspace Cleanup and ensure thoroughness in your efforts.
Steps to Clean a Crawl Space
Before starting a crawlspace cleanup, ensure you have proper safety gear. Protective gloves, a mask, and goggles are essential to shield against dust, mold, and potential allergens. Begin by removing any debris, including leaves, trash, or old insulation, which may have accumulated over time. This initial step helps create a clear working area and allows for better assessment of the space’s condition.
Next, inspect the area for signs of water damage or pest infestation. Address any issues such as leaks or standing water, as these can lead to more serious problems if left unattended. Once the area is dry, consider using a vacuum equipped with a HEPA filter to eliminate remaining dust and allergens. After the vacuuming, apply a disinfectant suitable for crawlspaces to reduce mold and bacteria. Following these detailed steps will help ensure a thorough and effective crawlspace cleanup.
Detailed Cleaning Process
Begin the crawlspace cleanup by ensuring the area is safe to enter. Wear protective gear such as gloves, masks, and knee pads to minimize exposure to dust, mold, or pests. Remove any stored items, debris, and insulation that may impede the cleaning process. Assess the condition of the crawl space, looking for signs of mold, water damage, or pest infestations that may require other interventions before proceeding.
Next, use a vacuum or a broom to thoroughly remove loose dirt and debris. Pay special attention to corners and hard-to-reach areas where dust can accumulate. If mold is present, it’s essential to scrub affected surfaces with a mixture of water and vinegar or a commercial mold cleaner. After cleaning, consider applying a vapor barrier or insulation to prevent future moisture issues and enhance the overall energy efficiency of your home. Regular maintenance and inspections are crucial to keeping the crawl space clean and functional.
FAQS
Why should I clean my crawl space?
Cleaning your crawl space helps improve air quality in your home, prevents mold growth, eliminates pests, and can contribute to energy efficiency by ensuring proper insulation and ventilation.
How often should I clean my crawl space?
It is generally recommended to clean your crawl space at least once a year, but you may need to do it more frequently if you notice issues such as moisture, pests, or foul odors.
Can I clean my crawl space myself?
Yes, you can clean your crawl space yourself if you have the right tools, materials, and knowledge. However, if the space is heavily infested or contaminated, it may be safer and more effective to hire a professional.
What tools do I need to clean a crawl space?
Essential tools for cleaning a crawl space include a vacuum with a HEPA filter, gloves, masks, a shovel, a mop, and a moisture meter. Additionally, consider using a dehumidifier or fan for ventilation.
What are the risks of not cleaning my crawl space?
Not cleaning your crawl space can lead to mold growth, structural damage, pest infestations, and poor indoor air quality, which can affect your health and the integrity of your home.
Related Links

Duration of Cleaning Jobs
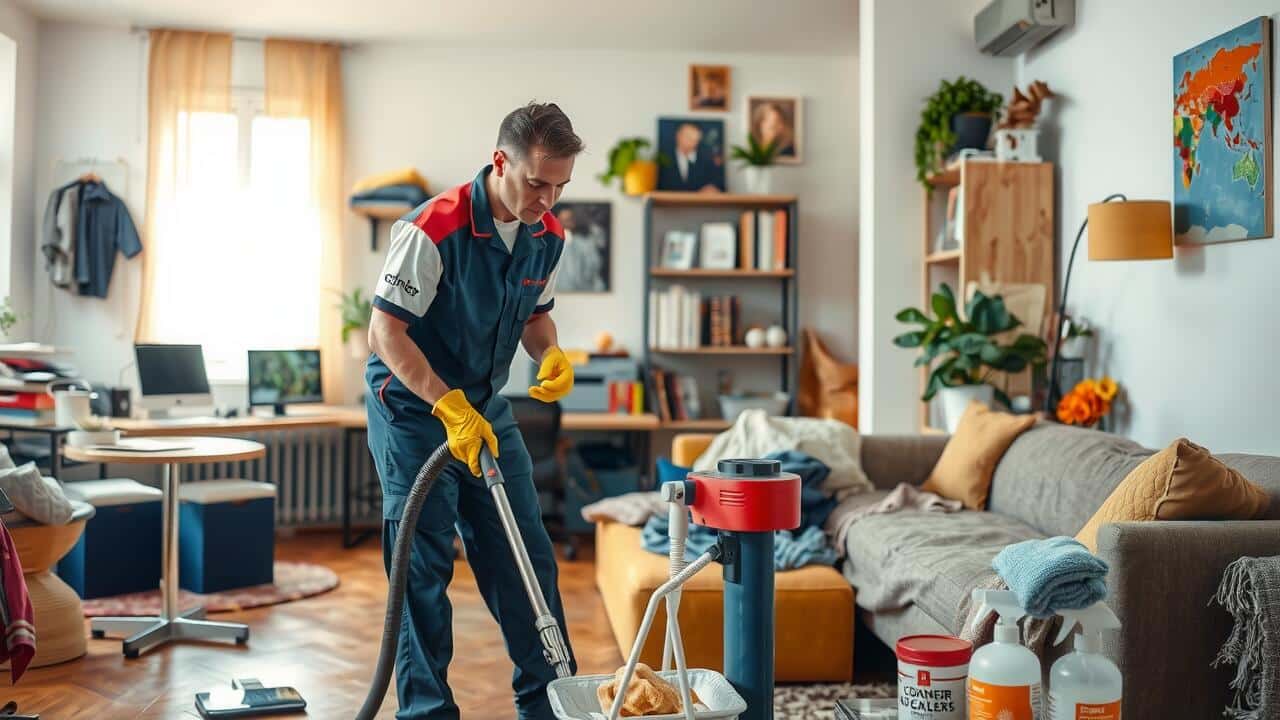
The duration of cleaning jobs can vary significantly based on the size and condition of the space being cleaned. A three-hour cleaning session might be sufficient for smaller areas like studio apartments or individual offices. In contrast, larger homes or commercial buildings often require more time to ensure a thorough job.
Content cleaning is another factor that influences the overall duration. This process can include deep cleaning tasks such as organizing and sanitizing items, which takes additional time. Clients may have varying requirements for their cleaning, making it essential to assess the specific needs before determining the appropriate duration.
Pricing for Short-Term vs. Long-Term Jobs
Pricing for cleaning services can vary significantly based on the duration of the job. Short-term jobs, such as a one-time cleaning session, often command a higher hourly rate due to the lack of commitment from clients. Factors like flexibility in scheduling and the immediate nature of the service impact pricing. For instance, a three-hour cleaning session may yield a different rate compared to a long-term contract where services are provided on a recurring basis. Clients seeking such arrangements may be more inclined to negotiate for a lower overall cost due to the guaranteed work over time.
When it comes to specialized services, such as content cleaning, the pricing strategy may shift accordingly. Clients looking for a comprehensive cleaning experience that includes meticulous attention to interactive elements might be willing to pay more, especially if they prioritize quality and thoroughness. This focus allows cleaning professionals to increase their rates or offer package deals that reflect the added value of their expertise. Emphasizing the distinctiveness of services provided can help in justifying the pricing structure, regardless of whether the job is short-term or long-term.
Equipment and Supplies
When determining your rate for cleaning services, the cost of equipment and supplies plays a crucial role. Basic cleaning supplies like detergents, mops, and vacuum cleaners may be necessary for general tasks. However, if you are specializing in services like Content Cleaning, the expenses can increase significantly. Specialized products and tools designed for deep cleaning may be required, influencing your pricing structure.
The impact of supplies on your rate can vary depending on the job’s complexity and duration. For instance, using eco-friendly products can appeal to a specific clientele but often comes with a higher price tag. When offering Content Cleaning, it’s essential to factor in the additional supplies and labor involved. These considerations will help you establish a fair rate that accurately reflects the quality of service provided.
Impact of Supplies on Your Rate
The type of supplies and equipment you use can significantly influence your cleaning rate. High-quality cleaning products often yield better results and may require a higher investment. Clients may be willing to pay a premium for the assurance that their spaces are being cleaned with safe and effective materials. Additionally, specialized services such as Content Cleaning may necessitate specific tools and supplies, further affecting your pricing structure.
When pricing your services, consider the cost of consumables and equipment maintenance. If you provide your own supplies, that should be factored into your hourly rate. However, if you expect clients to supply their own materials, make sure to clarify this in your contract. Understanding these elements will help you establish a competitive yet fair price for your cleaning services.
Additional Services
Offering additional services can significantly enhance your earnings. When clients hire you for cleaning, they may also appreciate specific tasks such as organizing spaces, deep cleaning upholstery, or even content cleaning. Providing these extra services allows you to cater to their unique needs and can justify a higher overall rate for your time and skills.
Upselling these additional offerings during the initial discussion can help set the stage for higher revenue. Many clients may not realize the extent of what you can provide. By clearly outlining the benefits of content cleaning alongside your standard services, you can create opportunities for more extensive and profitable jobs.
Upselling to Enhance Earnings
Upselling additional services can significantly boost your earnings while providing added value to your clients. Offering services such as Content Cleaning alongside regular cleaning tasks can make your business more appealing. Many clients appreciate the convenience of having multiple services performed during one visit. Promoting these extras in your initial pitch often leads to higher overall satisfaction and can encourage repeat business.
When discussing the benefits of Content Cleaning, emphasize how it enhances the overall cleanliness of their space. By presenting it as an essential part of a comprehensive cleaning package, you can attract clients who may not have considered it otherwise. Tailoring your upsell strategy to address specific client needs can further increase your chances of closing these additional services and enhancing your profit margins.
FAQS
How do I determine my hourly rate for cleaning services?
To determine your hourly rate, consider factors such as your experience, the local market rates, the type of cleaning services you offer, and any overhead costs associated with your business.
Should I charge more for specialized cleaning services?
Yes, you can charge more for specialized cleaning services, such as deep cleaning, post-construction clean-up, or eco-friendly cleaning, as these require additional skills and tools.
What are some common pricing models for cleaning services?
Common pricing models include hourly rates, flat fees for specific tasks, and package deals that offer a set price for multiple services over a designated period.
How can the type of cleaning equipment and supplies I use affect my pricing?
The quality and cost of your cleaning equipment and supplies can impact your pricing, as using premium products and tools may allow you to charge higher rates due to the improved results and efficiency.
Is upselling additional services worthwhile for increasing earnings?
Yes, upselling additional services, such as window cleaning or carpet shampooing, can significantly enhance your earnings, especially if you create value by explaining the benefits to your clients.
Related Links

How to Activate Dehumidification Mode
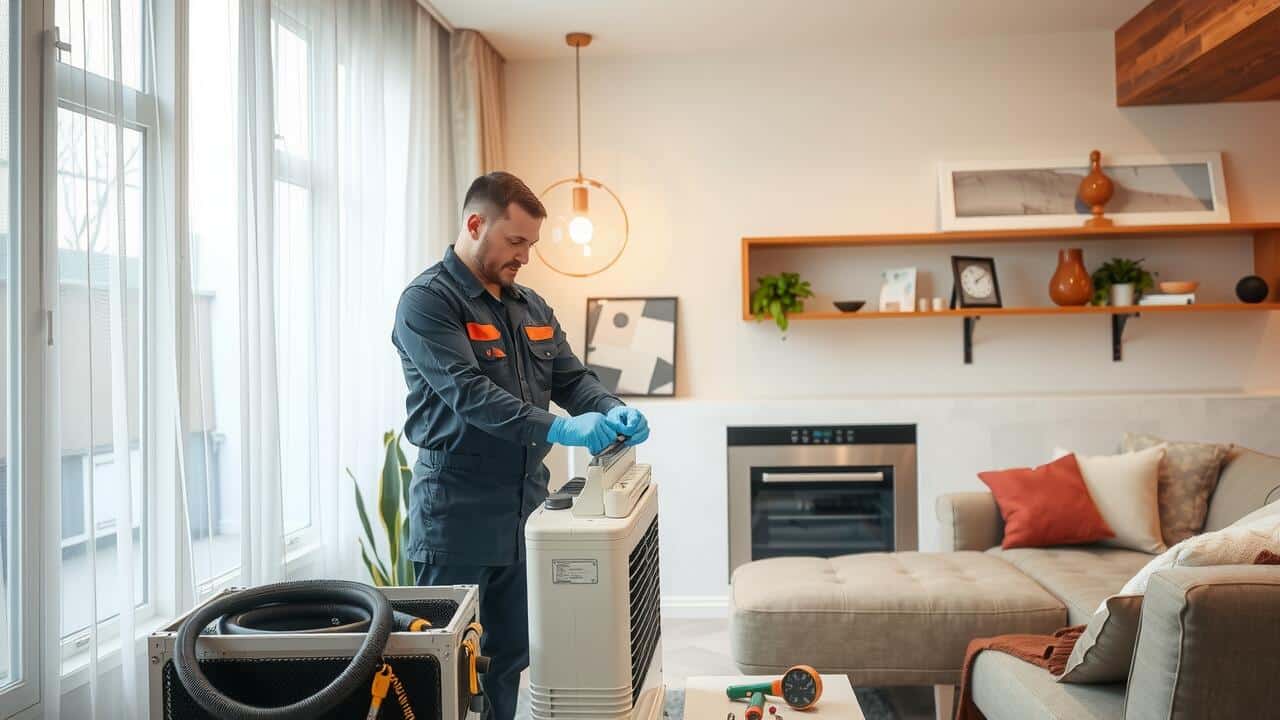
Activating the dehumidification mode on your air conditioning unit is a straightforward process. Begin by locating the control panel on your AC unit or remote control. You may see multiple settings listed for cooling, heating, and fan modes. Look for an option explicitly labeled “Dehumidification” or sometimes referred to as “Dry Mode.”
Once you identify the appropriate setting, press the button or turn the dial to switch to dehumidification mode. Some units might require you to adjust the temperature settings to optimize performance. After selecting this mode, your AC will reduce humidity levels without significantly lowering the temperature in your space. Make sure to monitor the unit to ensure it operates efficiently and effectively.
Step-by-Step Guide
Activating the dehumidification mode on your air conditioner is a straightforward process. Start by locating the control panel on your unit. Most systems will have a specific button labeled “Dehumidification” or an icon that resembles a water droplet. Press this button to switch your AC to the dehumidification setting.
Next, adjust the temperature settings if necessary. While the dehumidification mode primarily focuses on reducing humidity levels, some units allow for temperature adjustments alongside. Monitor your space to ensure comfort as the air conditioner works to improve air quality by removing excess moisture.
Common Misconceptions About Dehumidification Mode
Many people mistakenly believe that the dehumidification mode on an air conditioning unit is simply a more powerful cooling function. They assume that activating this mode will lower the room temperature significantly while simultaneously reducing humidity. In reality, the primary function of dehumidification is to remove excess moisture from the air, which can lead to a more comfortable indoor environment without excessive cooling. This mode operates differently, focusing on moisture extraction rather than temperature reduction.
Another common misconception is that using the dehumidification mode has the same energy consumption as running the AC at a conventional cooling setting. In truth, dehumidification typically requires less energy because it doesn’t work as hard to lower temperature levels. By prioritizing humidity control, this mode can help improve indoor air quality while potentially leading to energy savings. Understanding these aspects of dehumidification can help users maximize the efficiency of their cooling systems.
Debunking Myths
Many people believe that using dehumidification mode on an air conditioner is the same as cooling the space. This is a misconception. While both processes manage humidity levels, dehumidification primarily focuses on removing excess moisture from the air without significantly lowering the temperature. As a result, you may still feel warm even when the humidity is reduced, especially in very hot conditions.
Another common myth is that running the dehumidification mode consumes as much energy as cooling mode. In reality, this mode is often more energy-efficient because it operates the compressor at a lower capacity. The result is reduced energy usage while effectively maintaining comfort by lowering humidity levels. Understanding these distinctions can help users optimize their air conditioning systems for better performance and comfort.
Energy Efficiency in Dehumidification Mode
Dehumidification mode on an air conditioning unit can improve energy efficiency by reducing humidity levels without significantly lowering the temperature. This mode focuses on removing excess moisture from the air, which can help maintain comfort during hot and humid weather. By operating in this way, the air conditioner does not need to work as hard to cool the space, leading to potentially lower energy consumption compared to traditional cooling settings.
In addition to enhancing comfort, the use of dehumidification helps to prevent issues related to excess moisture, such as mold and mildew growth. These problems can lead to costly repairs and health complications over time. By managing humidity levels efficiently, dehumidification mode not only improves indoor air quality but also supports energy conservation efforts, contributing to more sustainable household practices.
Impact on Energy Consumption
Dehumidification mode on an air conditioner can significantly influence energy consumption. This feature operates by reducing humidity levels in the air without excessively cooling the space. As a result, the system can maintain a comfortable indoor environment while consuming less energy compared to when it runs in full cooling mode. Users may notice lower energy bills during humid months, making this setting a practical choice for maintaining comfort efficiently.
Many people assume that dehumidification mode uses just as much energy as regular cooling. However, the lowered cooling load means that the compressor works less frequently, leading to potential energy savings. By prioritizing humidity control, this mode can enhance indoor air quality while ensuring efficient operation, making it advantageous for both home comfort and energy use.
FAQS
What is dehumidification mode on an air conditioner?
Dehumidification mode on an air conditioner is a setting that reduces the humidity level in the air without significantly lowering the temperature. It helps create a more comfortable indoor environment, especially in humid conditions.
How do I activate dehumidification mode on my AC?
To activate dehumidification mode, refer to your air conditioner’s remote control or control panel. Look for a button or setting labeled “Dry” or “Dehumidify,” and select it. Consult your user manual for specific instructions, as the process may vary by model.
Does using dehumidification mode save energy?
Yes, using dehumidification mode can save energy compared to regular cooling mode, as it typically requires less power to remove humidity from the air rather than cooling it significantly. However, the energy savings can vary depending on usage and environmental conditions.
Can I use dehumidification mode all the time?
While you can use dehumidification mode frequently, it is not designed for continuous use. It is best used during particularly humid conditions or when you want to maintain comfortable humidity levels without excessively cooling the space.
What are some common misconceptions about dehumidification mode?
One common misconception is that dehumidification mode cools the air more than regular cooling mode. In reality, it primarily focuses on reducing humidity levels without significantly lowering temperature. Another misconception is that it will not affect energy bills, but while it can be more energy-efficient, it still consumes electricity.
Related Links

Preventive Measures for Future Moisture Issues
To prevent future moisture issues in hardwood floors, it’s essential to address possible sources of humidity in your home. Investing in a dehumidifier can effectively reduce moisture levels, especially in basements or regions prone to high humidity. Sealing all windows and doors can prevent outside moisture from entering your living space. Regularly checking plumbing for leaks will also help you identify problems before they cause significant damage.
Hardwood floor drying is another important measure in maintaining the integrity of your floors. After heavy cleaning or spills, ensure that any moisture is promptly removed. Use dry cloths or mops to absorb excess water rather than letting it seep into the floorboards. Creating a routine that includes monitoring humidity levels and drying any spills will go a long way in preserving the quality of hardwood floors and preventing future moisture accumulation.
Maintaining Optimal Humidity Levels
Maintaining optimal humidity levels is crucial for the health of hardwood floors. Wood is a natural material that can absorb moisture from the environment. When humidity levels are too high, the wood may swell or warp, leading to potential damage. Using a humidifier in dry seasons can help keep moisture balanced, while dehumidifiers can reduce excess humidity during damp periods. Regularly checking humidity levels with a hygrometer provides valuable insights into your home’s moisture balance.
Hardwood Floor Drying techniques can also aid in maintaining healthy conditions. When spills occur, prompt cleaning is essential to prevent excessive moisture from soaking into the wood. In addition, ensuring proper ventilation in areas like basements and bathrooms can help keep humidity at bay. By consistently monitoring and managing humidity levels, homeowners can preserve the beauty and integrity of hardwood floors, preventing future issues associated with moisture.
Choosing the Right Flooring Finish
Selecting the appropriate flooring finish is crucial for enhancing the resilience of hardwood floors against moisture. Various finishes come with different levels of protection. For instance, oil-based polyurethane offers a durable top coat that provides significant moisture resistance. Water-based options dry faster and emit fewer fumes while still guarding against spills and humidity.
Adequate flooring finish not only helps in preventing moisture accumulation but also contributes to hardwood floor drying faster after any cleaning or spills. A well-sealed surface minimizes the absorption of water, thus preserving the integrity of the wood. Regular maintenance of the finish will ensure long-lasting protection against moisture-related issues, keeping your hardwood floors in pristine condition.
Benefits of Moisture-Resistant Coatings
Moisture-resistant coatings provide an essential layer of protection for hardwood floors, helping to prevent water damage in the first place. These coatings create a barrier that inhibits moisture penetration, safeguarding the wood from swelling, warping, or cracking. Additionally, investing in these finishes can prolong the lifespan of your flooring, reducing the need for repairs caused by excessive moisture exposure. Hardwood Floor Drying becomes much easier when a moisture-resistant finish is applied, as the coating helps keep the wood stable and dry.
Incorporating moisture-resistant coatings also enhances the aesthetic appeal of hardwood floors. These finishes not only protect against moisture but also improve the overall shine and color of the wood, giving it a fresh and polished look. Regular applications of such coatings can further maintain this visual enhancement while ensuring the integrity of the flooring. Homeowners can enjoy peace of mind knowing their hardwood floors are well-protected against moisture-related issues, thereby making a sound investment in their property.
Regular Maintenance Practices
Regular maintenance practices are essential for preserving the integrity of hardwood floors. Regularly sweeping or vacuuming helps to remove dirt and debris that can scratch the surface. Using a damp mop with a suitable hardwood floor cleaner prevents excessive moisture accumulation while providing a thorough cleaning. Avoiding standing water is crucial, as any moisture left behind can seep into the wood and lead to warping or swelling.
In addition, incorporating hardwood floor drying techniques after spills or cleaning can protect against long-term damage. Employing fans or dehumidifiers in high-humidity environments aids in maintaining proper moisture levels. Ensuring that your flooring is kept dry not only preserves its appearance but also extends its lifespan. Regular inspections for signs of moisture-related issues play an integral role in maintaining hardwood floors effectively.
Cleaning and Care Tips
Regular cleaning and care are essential for maintaining the beauty and integrity of hardwood floors. Start by sweeping or vacuuming to remove dust and debris. This helps prevent scratches and ensures that the surface remains clean. For deeper cleaning, use a damp mop with a solution specifically designed for hardwood. Avoid excessive water, as it can seep into seams and cause moisture-related issues.
In addition to routine cleaning, consider implementing a hardwood floor drying regimen. After cleaning, ensure proper ventilation in the room to facilitate drying. Open windows or use fans to help moisture evaporate. Keeping an eye on humidity levels can also prevent the absorption of moisture, further protecting the flooring. Regular attention to these details will prolong the life of your hardwood and maintain its natural luster.
FAQS
What are the common causes of moisture accumulation in hardwood floors?
Common causes of moisture accumulation in hardwood floors include high humidity levels, leaks from plumbing or appliances, spills that are not promptly cleaned, and inadequate ventilation in areas where hardwood floors are installed.
How can I check if my hardwood floors are damp?
You can check if your hardwood floors are damp by performing a moisture test, either with a moisture meter specifically designed for wood or by placing a plastic sheet on the floor for 24 hours and checking for condensation.
What immediate steps can I take to remove moisture from my hardwood floors?
Immediate steps include using fans or dehumidifiers to increase air circulation and lower humidity, mopping up any spills promptly, and placing towels or absorbent materials on damp areas to soak up excess moisture.
How often should I perform maintenance on my hardwood floors to prevent moisture issues?
It’s recommended to perform regular maintenance at least once a month, including cleaning, checking for leaks, and ensuring that humidity levels are optimal to prevent moisture issues.
Can I use a steam cleaner on hardwood floors to remove moisture?
No, using a steam cleaner on hardwood floors is not advisable as the heat and moisture can damage the wood and lead to warping or other issues. Instead, opt for a damp mop and a suitable wood floor cleaner.
Related Links
Maintenance Tips for Water Extractors
Regular maintenance is crucial for the optimal performance of water extractors. After every use, it’s essential to empty the tank and clean any filters to prevent buildup and clogs. This process not only prolongs the lifespan of the machine but also ensures that it achieves maximum efficiency during water extraction. Inspecting the hoses for any signs of wear or leaks can help identify potential problems before they escalate.
In addition to routine cleaning, water extractors should receive comprehensive maintenance periodically. Check the motor and other internal components for dust and debris, which may hinder operation. Ensuring that seals are intact will help maintain suction power during water extraction. Staying on top of these tasks enhances performance and reduces the likelihood of unexpected repairs down the line.
Ensuring Longevity and Performance
Regular maintenance is crucial for preserving the performance of a water extractor. This involves routine inspections to check for any signs of wear or damage. Ensuring that the filters are clean and free from debris enhances the machine’s efficiency. Periodically emptying the recovery tank is important as well, preventing overflow and facilitating smooth water extraction. Adhering to the manufacturer’s guidelines regarding servicing and upkeep will help extend the lifespan of the unit.
In addition to routine maintenance, proper operation plays a significant role in ensuring the longevity of the water extractor. Users should avoid overloading the machine to prevent strain on the motor and other components. Following the recommended settings for different surfaces and types of water extraction will optimize performance. Implementing these practices not only boosts efficiency but also minimizes the risk of breakdowns, ensuring that the water extraction process is both effective and reliable.
Choosing the Right Water Extractor
Selecting the appropriate water extractor involves evaluating several key factors to ensure it meets your specific needs. First, consider the scope of the project at hand; the size of the area that requires water extraction significantly influences the choice of equipment. For smaller spaces or minor incidents, a portable unit may suffice. Conversely, larger projects, such as commercial properties or flooding situations, may necessitate more powerful, truck-mounted extractors.
Another crucial aspect is the type of water to be extracted. Water extraction from clean water sources, such as spills or leaks, differs from that of grey or black water, which may contain contaminants. Some water extractors are designed to handle only particular types of water, while others are versatile enough to manage various levels of contamination. Assessing the water’s condition will help narrow down the options and ensure the selected extractor can effectively handle the task at hand.
Factors to Consider When Selecting
When selecting a water extractor, one of the primary factors to consider is the size and capacity of the unit. Different environments require different levels of water extraction efficiency. For large areas prone to flooding, a more powerful extractor may be necessary to manage significant water removal effectively. Conversely, smaller units can be ideal for routine tasks, such as tackling wet basements or cleaning up spills, offering flexibility based on the specific needs of the space.
Another important factor is the technology utilized in the machine. Advanced water extraction systems often feature improved suction capabilities and filtration systems that enhance performance. Choosing a model with features such as automatic shut-off, adjustable speed settings, and ease of maintenance can contribute significantly to operational efficiency. Evaluating these characteristics can help ensure the selected water extractor aligns with the intended applications and provides reliable water extraction whenever needed.
Water Extractors vs. Traditional Methods
Water extraction provides several advantages over traditional drying methods, particularly in terms of speed and efficiency. While conventional techniques like air drying and towels can leave residual moisture and take a significant amount of time to dry surfaces, water extractors are designed to remove water quickly and thoroughly. This efficiency minimizes the risk of mold and mildew growth, which can occur with slower drying methods, making water extraction a preferable choice for those dealing with water damage or spills.
Additionally, water extraction technology often incorporates powerful suction capabilities that enhance its effectiveness. Traditional methods may not adequately address deep-set moisture in carpets, padding, or upholstery, which can lead to persistent odors and deterioration. Water extractors penetrate surfaces more effectively, ensuring that all moisture is removed. This thoroughness provides a higher level of cleanliness and hygiene, which is especially important in environments like homes, offices, and commercial spaces where dampness can present health concerns.
Comparing Effectiveness and Speed
Water extraction is often more efficient than traditional methods for removing excess moisture from surfaces. This technology utilizes powerful suction capabilities that quickly draw water from carpets, upholstery, and other materials. Speed is one of the key advantages, as water extractors can significantly reduce drying times compared to conventional means such as towels or air drying. This rapid removal of moisture helps to prevent further damage and the growth of mold or mildew.
In contrast, traditional methods tend to be slower and may require multiple steps to achieve similar results. For instance, using towels or fans can be labor-intensive and may not provide the same thoroughness of water extraction. While both approaches aim to address moisture issues, water extractors stand out for their ability to deliver swift and effective results, making them a preferred option in both residential and commercial settings.
FAQS
What is a water extractor?
A water extractor is a specialized machine designed to remove excess water from carpets, upholstery, and other surfaces quickly and efficiently, often used in cleaning and restoration processes.
How does a water extractor work?
A water extractor works by using a suction mechanism to draw out water from the material while simultaneously using a pump to remove it from the area, typically employing heat and vacuum power for effective water removal.
What are the benefits of using a water extractor over traditional methods?
Water extractors offer several advantages, including faster drying times, improved cleaning performance, and the ability to handle larger volumes of water, making them more effective than traditional methods like towels or mops.
Do I need to maintain my water extractor?
Yes, regular maintenance is essential for ensuring the longevity and performance of your water extractor. This includes cleaning filters, checking hoses, and ensuring that all components are functioning properly.
Can a water extractor be used for other purposes besides water removal?
Yes, many water extractors can also be used for tasks such as deep cleaning carpets and upholstery, making them versatile tools for both water extraction and thorough cleaning.
Related Links
Environmental Considerations
Water extraction plays a critical role in addressing human and ecological needs, but it brings significant environmental considerations. Over-extraction can lead to the depletion of local water sources, threatening ecosystems that rely on steady water availability. Aquatic life, including fish and plant species, may suffer as habitats shrink or disappear entirely. Groundwater depletion can cause land subsidence and affect the quality of water remaining in reservoirs.
The impact of water extraction extends beyond immediate ecological effects. Land and water use changes can alter natural cycles, leading to longer-term consequences for biodiversity and climate regulation. Ineffective management of extraction practices can also exacerbate water pollution, as contaminants may be drawn into aquifers or surface water systems. Striking a balance between human consumption and environmental sustainability is essential for maintaining healthy ecosystems.
Impact on Ecosystems
Water extraction can significantly alter local ecosystems. When large volumes of water are diverted from rivers or aquifers for agricultural or industrial use, it can lead to reduced water levels in surrounding habitats. This depletion affects the flora and fauna that rely on stable moisture levels. Aquatic species might struggle to survive as their habitats change or diminish, leading to a decline in biodiversity.
Additionally, the process of water extraction can disrupt the natural flow of rivers and streams. Changes in sediment transport and water quality can have lasting impacts on aquatic ecosystems. These disruptions not only harm fish populations but can also affect the larger food web that depends on healthy water sources. Managing the balance between water extraction and maintaining ecological integrity remains a critical challenge for environmental conservation.
Water Extraction Technologies
Water extraction technologies have evolved significantly over the years, embracing both traditional methods and modern innovations. Techniques such as desalination and groundwater extraction utilize advanced filtration and purification processes. These technologies enable the conversion of seawater into potable water and allow access to underground aquifers that would otherwise remain untapped. Each method poses unique operational challenges, and addressing these is essential for improving efficiency and sustainability.
Emerging technologies in water extraction also focus on reducing environmental impact. Innovations like solar-powered desalination leverage renewable energy sources, promoting sustainability in water resource management. Additionally, smart monitoring systems enhance the extraction process by providing real-time data, enabling more effective management of water supplies. These advancements offer promising solutions to meet increasing global water demands while preserving ecosystems.
Innovations Shaping the Future
Advancements in technology are significantly changing the landscape of water extraction. New methods, such as atmospheric water generation, utilize humidity to produce fresh water. These technologies offer solutions for areas with limited access to clean water. Additionally, improvements in desalination techniques are making it more viable to convert seawater into fresh water, providing an alternative source in coastal regions.
Sustainability is a key focus in the development of water extraction technologies. Innovative approaches prioritize energy-efficient systems and the use of renewable energy sources to minimize environmental impacts. Smart water management systems leverage data analytics to enhance the efficiency of extraction processes, ensuring optimal use of available resources while reducing waste. These innovations represent a commitment to addressing water scarcity challenges in a responsible manner.
Water Extraction in Urban Areas
Urban areas often rely on advanced water extraction techniques to meet the high demand for this vital resource. Many cities implement systems to draw groundwater from aquifers or utilize surface water sources such as rivers and lakes. The effectiveness of water extraction in these settings hinges on both technology and infrastructure. Efficient distribution networks are crucial for ensuring that extracted water reaches households and businesses while minimizing waste.
In addition to traditional methods, cities are increasingly exploring innovative solutions for water extraction. Rainwater harvesting systems capture precipitation, reducing the strain on conventional sources. Advanced filtration and desalination technologies can transform seawater into potable water, providing alternatives in regions facing freshwater shortages. The integration of these practices showcases an evolving approach to urban water management, focusing on sustainability and resilience against climate change impacts.
Urban Water Management Solutions
Efficient urban water management is essential for maintaining sustainable water supplies in densely populated areas. One key strategy involves optimizing water extraction processes to ensure adequate availability while minimizing environmental impacts. Advanced technologies can help cities monitor water use patterns and demand, enabling more precise extraction methods that account for trends. These innovations support the balancing act between supplying water and preserving local ecosystems.
Rainwater harvesting is another important solution for urban areas. This approach collects and stores rainwater, reducing dependence on municipal water systems and easing the burden on water extraction sources. By integrating rainwater systems into urban infrastructure, cities can enhance their resilience against water shortages and reduce runoff, which can lead to pollution. Such methods also emphasize the importance of sustainable practices in urban development.
FAQS
What is water extraction?
Water extraction refers to the process of obtaining water from natural sources such as rivers, lakes, aquifers, or groundwater for various uses, including agricultural, industrial, and municipal purposes.
Can you provide an example of water extraction?
An example of water extraction is the process of drilling a well to access groundwater, which is commonly used for supplying water to homes, farms, and businesses.
What are the environmental impacts of water extraction?
Water extraction can lead to negative environmental impacts, including reduced water levels in natural sources, disruption of local ecosystems, and potential contamination of groundwater supplies.
What technologies are used in water extraction?
Technologies used in water extraction include pumps, filtration systems, and advanced methods like desalination, which converts seawater into freshwater.
How does urban water management relate to water extraction?
Urban water management involves strategies and technologies to efficiently extract, distribute, and manage water resources in urban areas to meet the needs of growing populations while minimizing environmental impact.
Related Links
Using Essential Oils for Mold Control
Essential oils have gained popularity as a natural option for mold control, offering an effective alternative to chemical solutions. Many people are exploring these methods due to concerns about the toxicity of conventional mold-remediation products. Essential oils such as tea tree, lavender, and eucalyptus not only have antifungal properties but also provide a pleasant fragrance. When diluted and applied strategically, these oils can mitigate mold growth in various environments.
While essential oils can assist in mold prevention and treatment, they should be part of a larger mold remediation strategy. It’s crucial to maintain proper ventilation and address underlying moisture issues to enhance the effectiveness of these natural remedies. Homeowners should also consider regular cleaning routines incorporating essential oils to create an inhospitable environment for mold spores while ensuring they take comprehensive steps to eliminate the root causes of mold growth.
The Benefits of Tea Tree Oil and Others
Tea tree oil is recognized for its powerful antifungal properties, making it an effective remedy for mold remediation. Its natural composition allows it to penetrate mold spores, disrupting their growth and helping to eliminate them from surfaces. This essential oil serves as a safer alternative to harsh chemical-based mold cleaners, reducing the risk of harmful side effects often associated with synthetic products.
Other essential oils, like lavender and lemon, also offer mold-fighting capabilities. These oils not only assist in mold remediation but can also impart pleasant fragrances, creating a more inviting atmosphere in your home. Incorporating these oils into regular cleaning routines can help maintain a mold-free environment while promoting overall wellness through their natural antimicrobial properties.
Importance of Humidity Control
Maintaining proper humidity levels is crucial in the fight against mold. High humidity creates an ideal environment for mold spores to thrive, leading to persistent growth and a range of health issues. By regulating indoor humidity, homeowners can significantly reduce the conditions that favor mold proliferation. This involves using dehumidifiers, ensuring proper ventilation, and keeping areas like bathrooms and kitchens dry.
Effective humidity control plays an essential role in mold remediation. It not only helps prevent future mold outbreaks but also supports the effectiveness of other mold removal techniques. Monitoring and adjusting humidity can be a proactive approach, making it easier for individuals to manage mold issues before they escalate. Ensuring a consistent environment with optimal moisture levels can lead to healthier living spaces.
Optimal Humidity Levels for Homes
Maintaining optimal humidity levels in homes is crucial for preventing mold growth. Mold thrives in damp environments, making it essential to keep indoor humidity between 30% and 50%. This range reduces the likelihood of mold spores settling and developing into a larger issue. Regularly monitoring humidity levels can help homeowners take proactive measures against mold infestations.
To achieve and maintain desired humidity levels, homeowners can utilize dehumidifiers, especially in areas prone to moisture, like basements and bathrooms. Proper ventilation is also key. Activities such as cooking and showering can increase humidity; therefore, using exhaust fans can aid in mold remediation. Keeping windows open when weather permits allows fresh air to circulate, further reducing moisture and providing a healthier living environment.
Structural Repairs to Combat Mold
Structural repairs play a crucial role in combating mold growth in any space. Addressing leaks and water damage is essential for eliminating the conditions that allow mold to thrive. Whether it involves patching up roofs, sealing windows, or fixing plumbing issues, prompt action prevents moisture from seeping into walls, basements, or attics. These preventative steps lay the groundwork for effective mold remediation, ensuring that any existing spores are less likely to return.
In addition to repairing physical damage, improving ventilation throughout a building significantly aids in mold control. Proper airflow reduces humidity levels, which is vital for damp environments where mold tends to flourish. Installing exhaust fans in areas like bathrooms and kitchens can help maintain lower moisture levels. Together with structural repairs, these measures create an environment that is less favorable for mold development, thereby enhancing the overall resilience of any property against mold infestations.
Addressing Leaks and Water Damage
Leaks and water damage create the perfect environment for mold growth within a home. Addressing these issues promptly is essential to prevent further damage and the proliferation of mold spores. Identifying sources of leakage involves inspecting roofs, windows, and plumbing systems. Repairing these leaks can significantly reduce moisture levels, which are critical in the mold growth cycle.
Once leaks have been addressed, it is vital to assess any water-damaged materials. This may include drywall, insulation, and wooden structures that may have absorbed moisture. Proper mold remediation processes will ensure that affected materials are either thoroughly cleaned or removed to eliminate any remnants of mold. This proactive approach not only protects the home but also safeguards the health of its occupants.
FAQS
What are the most effective natural methods to kill mold permanently?
Natural methods like using essential oils, particularly tea tree oil and lavender oil, can be effective in killing mold. Additionally, maintaining proper humidity levels and addressing water damage are crucial for long-term mold prevention.
How can I control humidity levels in my home to prevent mold?
To control humidity levels, use dehumidifiers, ensure proper ventilation, and repair any leaks or water damage. It’s recommended to keep indoor humidity levels between 30% and 50%.
Is it necessary to fix structural damages to eliminate mold permanently?
Yes, addressing structural issues such as leaks and water damage is essential for eliminating mold permanently. Mold thrives in damp environments, so repairing these problems helps prevent future infestations.
Can I use commercial mold removers alongside natural methods?
Yes, combining commercial mold removers with natural methods can enhance effectiveness. However, ensure that any products used are safe for your home and family.
How do I know if the mold is completely gone after treatment?
To ensure mold is completely gone, conduct a thorough inspection of the treated area, check for any signs of moisture, and consider using mold test kits or hiring a professional for testing.
Related Links
Professional Mold Removal Services
Professional mold removal services play a crucial role in effectively addressing mold infestations. These experts possess the training and equipment necessary to identify mold growth in hard-to-reach areas. They employ specialized techniques to ensure safe removal while minimizing the risk of spores spreading throughout the environment. By opting for professional help, homeowners can gain peace of mind, knowing that the mold is being dealt with comprehensively.
In addition to removal, professional services often provide valuable insights into mold prevention. After addressing the current issue, they can recommend changes to improve indoor air quality and humidity control. This proactive approach helps prevent future mold infestations. With their expertise, they can guide homeowners on best practices for maintaining a mold-free environment, ensuring that the risk of growth is significantly reduced in the long run.
When to Call in the Experts
Recognizing the need for professional help in dealing with mold is crucial. If you spot extensive mold growth or smell musty odors that linger despite cleaning efforts, it’s time to consult experts. Professionals can assess the situation, determine the extent of the infestation, and implement effective mold prevention strategies. They possess the necessary tools and expertise to address deeper issues that may not be obvious to an untrained eye.
Additionally, consider reaching out to mold remediation specialists if you have experienced water damage or plumbing leaks. Even if the visible signs of mold seem minimal, hidden moisture can lead to larger problems down the line. Professionals can ensure that proper containment procedures are followed and that all traces of mold are effectively removed, helping to prevent future growth. Their thorough approach extends beyond just elimination and includes guidance on long-term strategies for mold prevention.
Preventing Future Mold Infestations
Mold prevention starts with controlling moisture levels in your home. Keeping areas such as bathrooms, kitchens, and basements well-ventilated is essential. Use exhaust fans or open windows during and after activities that generate moisture, like cooking or showering. Check for leaks regularly and repair any water damage promptly. This vigilance can significantly reduce the risk of mold growth.
Another important aspect of mold prevention involves maintaining proper humidity levels. Aim to keep indoor humidity between 30% and 50%. Utilizing dehumidifiers in particularly humid areas can make a big difference. Additionally, choosing mold-resistant materials in construction and renovation can provide an added layer of defense against infestations. Taking these proactive measures strengthens your home’s resilience against mold.
Best Practices for Moisture Control
Controlling moisture is crucial for effective mold prevention in any indoor environment. Regularly inspect areas prone to dampness, such as basements and bathrooms. Ensure that plumbing fixtures are leak-free and that water intrusion issues are promptly addressed. Proper ventilation plays an important role, particularly in high-humidity areas. Using exhaust fans during and after activities like cooking or showering will help reduce moisture in the air.
In addition to addressing existing moisture issues, maintaining indoor humidity levels is essential. Using dehumidifiers can effectively combat excess humidity, especially in regions prone to high moisture. Aim to keep indoor humidity between 30% and 50%. Regularly monitor humidity levels with a hygrometer to catch any spikes early. By adhering to these best practices, you significantly decrease the likelihood of mold growth, which directly supports mold prevention efforts.
The Role of Humidity in Mold Growth
Humidity plays a crucial role in the growth of mold. Mold thrives in environments where the relative humidity is above 60%. Excess moisture in the air creates ideal conditions for mold spores to germinate and spread. Understanding this relationship is essential for effective mold prevention strategies. Maintaining appropriate humidity levels can significantly reduce the likelihood of mold infestations.
Indoor spaces often contribute to higher humidity levels due to activities like cooking, bathing, and laundry. Poor ventilation exacerbates the issue by trapping moisture indoors. Implementing proper ventilation systems and using dehumidifiers can help maintain the desired humidity range. Consistent monitoring of indoor humidity levels is vital for successful mold prevention and ensuring a healthier living environment.
Ideal Humidity Levels for Indoor Spaces
Maintaining ideal humidity levels in indoor spaces is crucial for mold prevention. Generally, relative humidity should be kept between 30% and 50%. Levels below 30% can lead to dry skin and respiratory issues, while those above 50% create a favorable environment for mold growth. Regular monitoring with a hygrometer allows homeowners to track humidity levels effectively.
Proper ventilation helps regulate humidity and contributes to mold prevention. Areas like kitchens and bathrooms often produce excess moisture and should be equipped with exhaust fans. Additionally, using dehumidifiers in damp locations can further control moisture levels. Implementing these practices supports a healthier living environment while minimizing the risk of mold-related problems.
FAQS
What methods kill 100% of mold?
The most effective methods for killing 100% of mold include the use of professional-grade mold removers, bleach solutions, and specialized mold-killing products that are EPA-approved.
Can DIY solutions completely eliminate mold?
While some DIY solutions like vinegar or baking soda can help manage mold growth, they may not completely eliminate mold colonies. For full eradication, professional services are often recommended.
How can I tell if mold has been completely removed?
To determine if mold has been completely removed, inspect the area visually, look for any signs of regrowth, and consider using mold testing kits or hiring professionals to conduct air quality tests.
What role does humidity play in mold growth?
Humidity is a critical factor in mold growth; high humidity levels, typically above 60%, create an ideal environment for mold to thrive. Maintaining lower humidity levels can help prevent mold infestations.
How can I prevent mold from returning after removal?
To prevent mold from returning, control moisture levels, fix any leaks, ensure proper ventilation, and maintain humidity levels below 60% through dehumidifiers or air conditioners.